Sunday, December 14, 2014

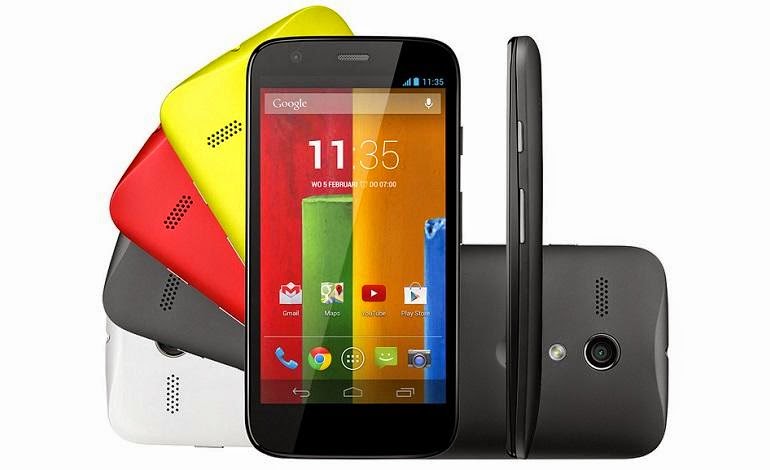
Lollipop is OUT.. and those having a Moto G are eagerly awaiting the OTA updates to reach their mobiles. Motorola had announced that Moto G - Both the 2013 and 2014 versions will be getting an upgrade. All those Motorola fans who have run out of patience - Read Ahead!!!


Google has released an OTA update for GPE (Google Play Edition) of Moto G. Believe me, it works just as fine on the other versions of Moto G as well. The link to download the firmware is provided below. Download the firmware, Flash it (steps and video provided) and enjoy the Lollipop!!!

1)        Download Android 5.0.1 update from Google for Moto G 2013 GPE HERE

2)        Save the file to the internal memory of your Moto G.

3)        Ensure that you have backed up all your data and the battery is at least 50% charged

4)        Power off the phone and restart into recovery. 

5)        For this, 

a)        Press Volume Up, Volume Down and Power keys together for about 5 seconds and then release. The recovery screen will be shown.

b)        Press the Volume Down key to highlight the Recovery option and then select it by pressing the Volume Up key. The Motorola Logo will appear on the screen

c)         Press the Volume Up and Volume Down buttons, then press and release the Power button while keeping the other buttons pressed.

d)        Moto G will now be booted in stock recovery mode and display "Android System Recovery" at the top of the screen.

6)        Press Volume Down key to highlight "Apply Update From SD Card"

7)        Press Power button to choose the selected option. The screen now shows the contents of the internal memory of your Moto G.

8)        Navigate to the downloaded update file using the Volume Up/Down keys and select the file using the power button.

9)        You will be asked to confirm whether to go ahead with the update. The update will take about 5 minutes

10)      Reboot and Voila!!! enjoy the Lollipop on your Moto G!


Friday, January 7, 2011

Labels: , , ,

utorrent is the most popular bittorrent client around - and there is a linux version available. So, when I searched how to set up utorrent in ubuntu, I was taken aback by the results I found - almost all the posts were to use wine to run windows version of utorrent in linux!!
Thats absurd, if not why have utorrent taken the effort to build a version for linux?
When I finished setting up utorrent, and strated downloading I couldnt believe how simple the whole process was.. All it took was
1. Download the linux version of utorrent from http://www.utorrent.com/downloads/complete?os=linux
2. Go to the dowload folder (lets say home/Downloads). You will find the downloaded tar file - utorrent-server-3.0-23418.tar.gz
3. Extract the tar file, for that right click on the tar file and choose Extract here.

4. Go to the folder utorrent-server-v3_0 created. You will find 1 folder and 2 files - docsutserverwebui.zip


5. Double click on utserver and a configuration file settings.dat will be created and the utorrent server starts up. 

6. Now open a webbrowser and go to the url http://localhost:8080/gui/ to get the gui for utorrent.

Tuesday, January 4, 2011

Labels: , , , , , ,


People who had used windows all their life and are starting to try out various linux distros have always missed some of the windows applications they had used, eventhough better replacements are available for linux. This is a nice demonstration of how u can use wine to run windows application on your linux machine.

Sunday, January 2, 2011

Labels: , , , ,


After ubuntu released wubi for people who were "afraid" to touch their hard disk partitions, but wanted linux, many had tried ubuntu installing it inside windows. Once they are comfortable with ubuntu, they start thinking of moving ubuntu to a seperate partition. But, how can it be done without losing all their information and data in the current ubuntu installation? 
That is answered here..

These are the steps required to migrate a wubi 9.10, 10.04 or 10.10 install to partition (grub2 only). The first part shows how to do a manual migration, and the second how to use the attached script to do an automated migration.

The partition(s) must be created already - there are plenty of guides on how to do this.

Manual migration (see below for automated migration)

This example assumes the new install will be on /dev/sda5 and that there will be a swap on /dev/sda6. If there is no swap, just ignore lines containing /dev/sda6. If there is a swap partition it must be of type 'swap'. Change the device names as appropriate.

1. Do this all as root
Code:
sudo -i
1.a. Ensure you do not have grub-legacy. If the output of the following shows version 0.97 then please do not continue. These instructions only work with grub versions 1.96 and greater.
Code:
grub-install --version
2. Format new partition if not done so already - make sure it's empty, large enough and unmounted
WARNING -- the next command will wipe all existing data on /dev/sda5
Code:
mkfs.ext4 /dev/sda5
3. Mount new partition and copy files. 
Code:
mkdir /tmp/wubimove
mount /dev/sda5 /tmp/wubimove
rsync -av --exclude=/host --exclude=/mnt/* --exclude=/home/*/.gvfs --exclude=/media/*/* --exclude=/tmp/* --exclude=/proc/* --exclude=/sys/* / /tmp/wubimove
chmod -x /tmp/wubimove/etc/grub.d/10_lupin
4. Setup swap partition and enable hibernation (swap must be at least as big as RAM to hibernate)
Code:
mkswap /dev/sda6
echo "RESUME=UUID=$(blkid -o value -s UUID /dev/sda6)" > /tmp/wubimove/etc/initramfs-tools/conf.d/resume
5. Edit fstab (blank out wubi mounts with sed and add new partitions)
Code:
sed -i 's:/.*[\.]disk .*::' /tmp/wubimove/etc/fstab    
echo "UUID=$(blkid -o value -s UUID /dev/sda5)    /    ext4    errors=remount-ro    0    1" >> /tmp/wubimove/etc/fstab
echo "UUID=$(blkid -o value -s UUID /dev/sda6)    none    swap    sw    0    0" >> /tmp/wubimove/etc/fstab
6. Remove lupin support and update grub (all in chroot). Note that this step installs the grub bootloader to /dev/sda and will replace your windows bootloader (the line 'grub-install /dev/sda') -- see note below
Code:
mkdir /tmp/wubimove/host
for i in dev proc sys dev/pts host; do mount --bind /$i /tmp/wubimove/$i; done
chroot /tmp/wubimove
dpkg-divert --local --rename --add /sbin/initctl
ln -s /bin/true /sbin/initctl
apt-get -y remove lupin-support
update-grub
grub-install /dev/sda
rm /sbin/initctl
dpkg-divert --local --rename --remove /sbin/initctl
exit
for i in host dev/pts dev proc sys; do umount /tmp/wubimove/$i; done
rmdir /tmp/wubimove/host
umount /dev/sda5
7. Update wubi grub menu to pick up new install and exit sudo
Code:
update-grub
exit
You're done. When you reboot, you should see a grub menu instead of the windows boot menu. Select the first entry. If you didn't run 'grub-install' you can boot from the wubi menu, select your new install from the bottom after the Windows entry.

NOTE on installing the grub bootloader: you can try out the new installation by booting it from the wubi grub menu first - if you want to make sure everything is working before replacing the windows bootloader. To do this, bypass the line 'grub-install /dev/sda' (in step 6.). You can then install the grub2 bootloader manually later after booting into the new install.
I also recommend updating the grub menu after booting into the target partition
Code:
sudo update-grub
Automated migration

I have attached a parameter driven script that does the above with additional validation e.g. checks the target partition is big enough and empty etc.

Usage instructions:
Code:
bash wubi-move.sh --help
To migrate wubi to /dev/sda5 without swap
Code:
sudo bash wubi-move.sh /dev/sda5
To migrate wubi to /dev/sda5 with swap on /dev/sda6
Code:
sudo bash wubi-move.sh /dev/sda5 /dev/sda6
If you don't want to install the grub bootloader i.e. you want to leave the windows bootloader in place, use the --no-bootloader option. In this case, you can boot the new install using the wubi menu, and will have to manually install the grub bootloader later.
Code:
sudo bash wubi-move.sh --no-bootloader /dev/sda5 /dev/sda6

Warning - while I have tested this numerous times and every attempt has been made to ensure there are no bugs, use it at your own risk.

Please note - it takes some time to copy all the data from wubi to the target partition. e.g. on my computer it takes about 5-10 minutes for a small install (5GB).

Known issues:
1. For some reason, running "update-grub" in the chroot doesn't pick up other linux installations on the same drive (same running the script or manual commands listed above). This is unlikely an issue for wubi users. Run sudo update-grub after booting the new install for the first time.
Attached Files
File Type: shwubi-move.sh (12.9 KB, 296 views)

Labels: , , , , , , ,

Connecting to internet using mobile phone as modem is easy from windows XP. The manufacturer provides you with the softwares required for windows - all that was required is to install the software and run the application. But when it comes to Linux, the whole picture changes. There is no default software from the manufacturer, there is no other third-party applications available.


Most of the linux users, like me gave up linux when they faced this. I had searched the net for days (months maybe), but got nothing valuable - there is always the geeky way, setting up wvdial/kppp running commands from 'terminal'. But, when I found out that all these were not required, everything needed to setup the connection was just a few clicks away - I felt a fool of myself - for not taking the effort to look for it. It even has all the mobile sevice providers details for each country with the access point names (APN), for which we had to call the customer care earlier!!!.


I tried this with Ubuntu 10.10 and nokia 6300, but Iam sure this works for all other linux OS and mobile phones.
This is what is to be done.


Step 1: Go to System -> Preferences -> Network Connections. The below screen pops up.


Step 2: Select the tab "Mobile Broadband". Click "Add"


Step 3: In the screen that opens, your mobile phone model is shown. Click "Forward" if the model shown is correct or select the correct model and click "Forward".


Step 4: The next screen asks you to select the Service Provider's Country. Select the country and click "Forward".


Step 5: The next screen lists the service providers present in the country selected in previous step. Select your service provider  and click "Forward".


Step 6: The data plans available for the selected service provider is listed along with the plans APN. Select the plan you have subscribed to and click "Forward".


Step 7: The settings you have selected is shown. Click "Apply" to confirm the settings.


Step 8: In the next screen enter the dial up Number, Username, Password of the connection. Also give a suitable name for the connection in "Connection name" and then click "Apply".


Step 9: You are done with the setup. The Network Connections screen now shows the new connection under the tab "Mobile Broadband".


Step 10: To connect to the internet, click on the Connection icon in the toolbar and select your connection from the drop down list.


Saturday, April 3, 2010


On March 30, Google announced the launch of a new tool to find product information online in India. Google's new shopping tool - erstwhile available in U.S. and European countries now finds its way into India. Like Google shopping in the US, this tool indexes thousands of websites that have price and images of various products. As of now, the Indian avatar of Google Shopping throws data available from over 30,000 Indian websites.

Users can now try and look for product details and latest prices of goods and items across a wide spectrum. The tool also features a price comparison tool. This can help you look for the cheapest price available for the product of your choice. It also helps users choose products that are within their budgets. For example, you can search for all the phones that are priced from Rs.10,000 to Rs. 15,000.

One thing that Google could have made easier was getting into the shopping tool for India. This is the way Google suggests you need to adopt to use the shopping tool in India as of now. "To use Google's shopping tool, simply enter the product name into the search box at http://www.google.co.in. Then, on the results page, click on the "Show Options ..." link located above the search results and select "Shopping". Once you start seeing shopping results, you can customize your filtering options as required.
Dear Google, wouldn't a simple link be sufficient?


Saturday, January 9, 2010

Labels: , , , , ,

While almost all browsers today come with a speed dial function, it’s Google Chrome that has been missing it. Firefox too didn’t have it but plugins made it a reality. The speed dial feature in short allows you to access your most favourite sites in a start page. Bookmarks can do that but access to them is still a click or two away. 

So far, Chrome didn’t have extensions but we’re glad to inform you that those days are over. Assuming that you have Chrome updated to its latest version, head over to Chrome’s Extension gallery – (https://chrome.google.com/extensions). You’ll find many there but look specifically for the Speed Dial extension. Clicking on it will start the download and installation. 


Configuration Page
Opening the configuration window for Speed Dial

 Once the extension gets installed, click the Speed Dial icon in the address bar when you’re on a page you want to add to it. Click on Add Current Page. Open a new tab and you’ll see the Speed Dial window. To change the order of the bookmarks, click and drag the bookmarks around from one slot to another.


Speed Dial
The speed dial page


You’ll also notice that the Speed Dial icon has some resemblance to AVG’s icon. Click on the icon again, click Open Page and you’ll reach the configuration page for the extension. Once you’re there, you can easily set the number of speed dial links. Click on the dropdown to set it.

Setting the number of speed dial bookmarks you want


Themes
Setting themes and wallpapers for your speed dial

If the background is too boring, you can set colours or even a wallpaper like you would for your desktop. For some unknown reason, Chrome only lets you set images from the web as your wallpaper. So, if you have a wallpaper available locally, upload it and then link it to it.

You also have the option of displaying the other controls such as the search bar, bookmarks and the recently accessed pages. When you’re done, click on Save and Close.


Options
Turning on and off components on your speed dial page

 If you’re like us, you’ll soon be lining in your favourite sites for news, reviews, gaming, streaming in a very orderly manner.

Labels: , , , , , , , , , , ,

Intel Corporation has launched a beta version of its app store -- the Intel AppUp center -- for netbook computers. The first apps are now available for free download or purchase by visiting www.intelappup.com.
Four other Intel industry partners – Acer, Asus, Dell and Samsung - also announced store collaboration and plans.


The first apps now available cover education, entertainment, games, health, social networking and other categories. A sampling includes Arnold Palmer Golf, Boxee, Wikihow and Yoono.


The beta store will host applications for both the Microsoft Windows and the open source Moblin-based operating systems, the first operating systems to target the popular netbook computer category powered by the Intel Atom processor.


Over time, Intel and its partners expect to expand the stores to include applications for the large categories of handheld CE devices, smartphones, consumer electronic appliances, TVs and other devices based on future Intel processor families.
In addition to the Windows and Moblin-based operating systems, the Intel AppUp center will offer applications that use Web browser run-time environments such as Adobe Air and Microsoft Silverlight in the future.


Partner stores access the developer and store services the Intel AppUp center offers, including validating and categorizing apps and utilizing a common transaction infrastructure to administer purchases and downloads for these tailored stores. OEMs Acer, Asus, Dell and Samsung are working closely with Intel on their stores.

Thursday, December 24, 2009

Labels: , , , ,

How it feels
The Nexus One is slightly thinner than the iPhone 3GS, and slightly lighter. No hard specs were thrown around, unfortunately, since Google didn't even let people who they gave the phone to know that. The back is definitely not cheap and plasticky, like the iPhone's backing, and feels like some sort of rubbery material. So, not smooth like the iPhone, but not as rubbery as the Droid. It's halfway in-between.
You can call the design the antithesis of the Droid: smooth, curved, and light, instead of hard, square and pointy. It feels long and silky and natural in your hand—even more so than the iPhone 3GS. There are also three gold contacts on the bottom designed for future docking (possibly charging?) use, but there aren't any accessories available for the phone now. It plugs in via microUSB at the moment.
That screen is damn good
Even though the screen is the same size and same resolution as the Droid, it's noticeably better. The colors are much more vibrant and the blacks are blacker, as evidenced by putting both side by side and hitting up various websites and loading various games. The pinks on Perez Hilton and the blues on Gizmodo just popped a lot more on the N1, and made the Droid (which was actually considered to have a great screen) seem washed out. The same feeling carries over when you compare the Nexus with the iPhone 3GS. And it's pretty damn bright, compared to the other two phones.
This is probably the best screen we've seen on a smartphone so far. Probably.
Why is it so fast?
Google just gave Motorola (and Verizon) a swift shot to the TSTS, because the Nexus One is astonishingly faster than the Droid. The speed dominance was most evident when we compared the loading of webpages, but even when you're just scrolling around, launching apps and moving about the OS, you could tell that there's a beefier brain inside the N1. I don't know the specs for sure, but there's talk of a 1GHz processor being inside, which would push it quite a ways above the 550MHz Arm A8 in Motorola's newest toy.
When comparing the three phones in loading a webpage over Wi-Fi, the Nexus One loaded first, the iPhone 3GS came in a few seconds later, and the Droid came in a little while after that. This was constant throughout many webpage loads, so it's indicative of something going on inside with the hardware.
I ran all three through a Javascript benchmark engine for some quantifiable numbers, and while the results were similar between the Nexus One and the iPhone 3GS, the Droid still came up at about 60% of the other two. Surprisingly enough, Mobile Safari on the iPhone scored better on the Javscript benches than the Nexus did, even though the Nexus was able to pull down and render actual web pages faster. Note that I didn't list actual numbers here, for privacy reasons.
That crazy video background
You've no doubt heard about the animated video backgrounds, but they're actually more than just animations: you can interact with them.
The default background is the square/8-bit like one shown above, where lines of colored squares come in from different sides of the screen. What's neat (even if it is superfluous and battery draining) is that you can tap anywhere on the desktop in a blank space and trigger dots to spread out from your tap. Basically, press anywhere to cause blocks to fly outwards. The same thing happens in the "water" background, except instead of blocks, you cause ripples in the water.
What's also neat are the two virtual sound meters, which act as a visualizer for whatever music you're currently playing on your phone. There's one analog one that looks like one of the old ones with a red needle, and a "digital" one that looks similar to ones you see elsewhere. Sorta neat in itself, but it shows that the interactive backgrounds can actually interact with apps, as long as one knows the other's APIs.
Other bits
The 5-megapixel camera is nice, and the flash works well enough for a flash on a phone, but it's not spectacular, as seen by early photos taken and uploaded online by Googlers. There is autofocus, and you activate it with the trackball on the face of the phone. There is no tap-to-focus as see on the iPhone 3GS.
There's no multitouch in the browser or in the map, but I think at this point that's more of a legal consideration than a technical one, since many phones that run Android have the capability of supporting multitouch on a hardware level.
Playing back music over the speakers sounded decent, but not great. It's definitely in need of a dock—like all smartphones—if you want to listen to music for a sustained period.
I didn't get a chance to call on it, because I wanted to keep this as anonymous as possible, and didn't want any sort of way to trace when I used the phone. From what other people say in their time with it, it functions fine as a phone, and should work as normally as other Android phones in the SMS/MMS department.
So what's this all mean?
If Google's planning on releasing this phone as their official Google phone, it'll certify them as the premium Android phone brand out there right now. Even though it doesn't have a hardware keyboard, it basically beats the hell out of the Droid in every single task that we threw at it. And face it, some people didn't like the Droid's keyboard because it was too flush and the keys were too unseparated with each other. N1's onscreen keyboard felt fine, and the speedy processor made sure that each key was interpreted well.
But in the end, it's still an Android phone. If you want Android phones, this is the one to get, provided Google goes ahead with the rumored plans of either selling it themselves or partnering with T-Mobile in a more traditional role. Droid, shmoid; Nexus is the one you're looking for.
Olive Telecommunication has launched a new brand 'Olive Convergence' under which it has announced 3G embedded netbooks, Zipbooks.
Olive Telecommunication has tied up with Tata Teleservices for its EVDO based netbooks and the same will be available to consumers from select Tata Indicom Stores and through the Tata Photon channel. On the other hand for its HSPA version based netbooks Olive is in an agreement with BSNL, according to which the netbooks will be available at all BSNL 3G circles.
On the sidelines of the launch of Olive Convergence, the company also launched 7 models of mobile phones starting at Rs. 999. These include 2 touch screen phones - Olivepwrr and Olivetouch; Olivemsgr - the QWERTY keypad phone; 2 candy bar phones - Olivecompacta and Oliveglide and 2 dual sim/dual standby phones - V-G400 (clamshell) and V-G500 (slider).
The company also shared information about its convergence devices including a modem equipped with a hi capacity memory chip, the ability to tune into FM, a Dictaphone and the second role of an MP3 player.
Specifications of the phones and netbooks are not know yet.


Tuesday, December 22, 2009

Labels: , , , , ,


Intel Corporation has announced new Intel Atom processors that feature integrated graphics built directly into the CPU, enabling improved performance and smaller, more energy-efficient designs in a new generation of netbooks and Atom-based entry level desktop PCs.

Major OEMs have committed to having systems on the new Intel Atom processors and a new companion chipset available within the next few weeks.

The newest Intel Atom platform for netbooks consists of a new Intel Atom processor, the N450, and a new low-power Intel NM10 Express Chipset. For entry level desktop PCs, it consists of either the Intel Atom processor D410 or the dual core D510, also paired with the Intel NM10 Express Chipset. The Atom processor was designed from the ground up for small devices and low power, and remains Intel’s smallest chip, built on the company’s 45nm high-k metal gate manufacturing process.

One of the most significant features of the new platform is the integration of memory controller and graphics into the CPU, a first in the industry on x-86 chips. That means two chips (CPU+chipset) instead of the previous three (CPU, chipset, I/O controller hub), a lower TDP, and substantial reductions in cost, overall footprint and power. The netbook platform features a 20 percent improvement in average power and a smaller package size over the previous Atom platform. This translates into smaller and more compact system designs and longer battery life. Because of the integration, the total footprint for the netbook platform has decreased by approximately 60 percent. For entry level desktop PCs, it’s a nearly 70 percent reduction in footprint and about 50 percent lower TDP than the previous generation.


Intel continues to see broad industry support for the Atom platform as netbooks in particular have been hot sellers during a recessionary year due to their affordability, function and small size (7-10.2" screens). Additionally, Intel is expecting to see broad channel adoption for Atom in a variety of small form factor entry-level desktop PCs at low price points, including ultra-small designs (less than 1-litre chassis), fanless designs, and low-cost all-in-one designs.

Since Atom's introduction, Intel has shipped over 40 million Atom chips for netbooks to every major OEM around the world. In the same timeframe, netbooks ramped faster and sold more units than Apple’s iPhone or the Nintendo Wii. According to ABI Research, total Atom shipments for all segments are expected to continue to grow into the 100s of millions by 2011.

Intel has been working closely with mobile operators and modem vendors to advance 3G capabilities in netbooks in established and emerging markets. To-date approximately a dozen service providers offer netbooks in various markets, and the numbers are expected to grow with the newest platform.

Labels: , , , , , ,

Sony Ericsson has gone out of its usual conformity of using model numbers for mobiles and has just used a name for this handset - Aino (God knows what SE meant by it).

Form Factor
The Aino’s is a brilliantly crafted handset. It’s well balanced and very streamlined and the weight, although a little on the heavy side, gives the handset a definite feel good factor. The pop slider lives up to the term. It’s very smooth and can be opened or closed with a simply flick. Volume/Zoom keys are on the same side as the shutter release for the handset’s 8MP camera (with LED flash). Sony’s proprietary USB slot is located on the other side.

Aino comes with a Bluetooth enabled receptor that can be hooked up to a wired set of earphones. The Aino comes with the new chargers that have a secondary proprietary port built in so one could use a wired headset while charging though one isn’t included with the phone.
The Bluetooth adapter for the handsfree can also be charged when it’s placed in the bundled cradle. The Aino uses microSD cards to increase memory capacity and comes with an 8GB card. The slot is unfortunately located under the rear panel, but thankfully that’s quite easy to pop open.
The 3 inch display’s touch functionality can be accessed only in landscape mode for media. The resolution is 240 x 432 with 16million colors, but for some strange reason, I noticed, the resolution seemed a little askew in the media mode in terms of overall clarity. However I do like the idea of having the touchscreen specific to only one aspect of the handset's overall feature set although that does have a small measure of disadvantage as well. Read on.
Features and Performance
Interface
Sony Ericsson’s UI has, sadly, remained unchanged. It’s always been colorful and very animated, which also leads to a burden on the battery. I found a little bit of lag in the Aino’s UI, even when I selected the least animated theme. Refreshing new data in the media section was also a bit slow. In contrast though, the touchscreen media UI was quite responsive and well laid out thus making it very user friendly. While the handset does have an accelerometer to rotate web pages and the media gallery there’s no virtual keyboard as it does not activate the touch sensitive one so you’ll have to struggle to use the alphanumeric keypad in portrait mode. And there’s your disadvantage right there, since the browser can’t be accessed from the touch sensitive media menu.
Media
I’m quite disappointed with the audio functionality that the Aino brings to the table. While the quality of playback is not in question the decibel level is just too low. Mumbai city is deafening most of the time and without a decently high volume level you’ll never be able to enjoy your audio with the Aino. The Bluetooth tether for the handsfree is also a little large with a rather ‘Disco-like’ indicator system. SE has included quite a few very visually attractive visualizations to the player and of course EQ presets and a customizable option.
Another disappointment is that the handset, although equipped with a GPS module only comes with apps like Wisepilot and Google Maps that are primarily A-GPS enabled so quite pointless if you have no reception. The Tracker application is quite handy for those who enjoy jogging or walking as recreation or sport.

Tuesday, March 31, 2009

Labels: , , , , , , ,

1. Plug in the modem 
2. Open a terminal and login to the root user account (use the command su).
3. Execute the command:
# lsusb
4. Output will be something like:
Bus 007 Device 001: ID 1d6b:0002 Linux Foundation 2.0 root hub
Bus 006 Device 001: ID 1d6b:0002 Linux Foundation 2.0 root hub
Bus 004 Device 001: ID 1d6b:0001 Linux Foundation 1.1 root hub
Bus 002 Device 001: ID 1d6b:0001 Linux Foundation 1.1 root hub
Bus 001 Device 003: ID 1131:1001 Integrated System Solution Corp. KY-BT100 Bluetooth Adapter
Bus 001 Device 001: ID 1d6b:0001 Linux Foundation 1.1 root hub
Bus 005 Device 001: ID 1d6b:0001 Linux Foundation 1.1 root hub
Bus 003 Device 002: ID 05c6:6000 Qualcomm, Inc.
Bus 003 Device 001: ID 1d6b:0001 Linux Foundation 1.1 root hub
The second last line is what we are interested in:
Bus 003 Device 002: ID 05c6:6000 Qualcomm, Inc
The modem manufacturer is Qualcomm Inc. Note the USB device corresponding to it.
Here, 05c6 (in hexadecimal) is the Vendor ID and 6000 (again n hexadecimal) is the product ID. Note them down.
5. Execute the command:
# modprobe usbserial vendor=0x05c6 product=0x6000
The command is in the format:
# modprove usbserial vendor=0x<your_vendor_id> product=0x<your_product_id>
6. Execute the command:
# cd /dev# ls ttyUSB*
If there is a device with name ttyUSB0 then the modem has been recognized. Else, retry the above steps.

7. To configure the the dialler(the wvdial dialler is used), execute the command:
# wvdialconf /etc/wvdial.conf
NOTE: This command will work only if the wvdial is already installed. This dialler is part of most Linux distros (mandriva, ubuntu, fedora or openSUSE etc). If wvdial is not present, there should be some other dialler like kppp installed.
A file wvdial.conf will be created in the /etc directory. Execute the command to edit it:
For KDE users
# kwrite /etc/wvdial.conf
For Gnome Users
# gedit /etc/wvdial.conf
Change the file contents to:
[Dialer Defaults]
Init1 = ATZ
Init2 = ATQ0 V1 E1 S0=0 &C1 &D2 +FCLASS=0
Modem = /dev/ttyUSB0
Phone = #777
Idle Seconds = 7200
Modem Type = Analog Modem
Stupid Mode = 1
Compuserve = 0
Baud = 921600
Auto DNS = 1
Dial Command = ATDT
Ask Password = 0
ISDN = 0
Password = 
Username = 
For example, if the username and password are 1234567 & 1234, then the file would look like:
[Dialer Defaults]
Init1 = ATZ
Init2 = ATQ0 V1 E1 S0=0 &C1 &D2 +FCLASS=0
Modem = /dev/ttyUSB0
Phone = #777
Idle Seconds = 7200
Modem Type = Analog Modem
Stupid Mode = 1
Compuserve = 0
Baud = 921600
Auto DNS = 1
Dial Command = ATDT
Ask Password = 0
ISDN = 0
Password = 1234567
Username = 1234
8. Execute the command to dial up and connect to the internet:
# wvdial
DO not close the window as it would close the connection(better minimize it). And when you need to disconnect, press CTRL + C inside the window.
In case of problem, just add comment to this blog or mail me with the problem.